Design and Configuration of an IP-Based Telephony System via Asterisk - Part I

Asterisk is a free and open-source software framework that transforms an ordinary computer into a powerful communications server using Voice over IP (VoIP) and traditional telephony protocols. It enables users to build custom telephony solutions—most commonly an IP Private Branch Exchange (PBX)—without the expensive licensing fees associated with proprietary hardware.
In this post, we will demonstrate how to build a simple VoIP system within a local area network (LAN) using Asterisk on Linux OS. The setup begins with essential configurations, including creating SIP users and enabling voice calls between users on the same LAN. We then explore additional features such as voicemail, Interactive Voice Response (IVR), conference rooms, and more.
Environment Setup
For this project, the following components are required:
- A virtualization platform (VirtualBox or VMware)
- A Linux operating system distribution (Ubuntu is recommended)
- Asterisk software
- A Softphone (use Your IOS/Android Phone by installing a Softphone app)
You can follow the tutorial below to set up the lab environment and install Asterisk:
Starting The Service :
To start the Asterisk service on Linux, use the following command:
1
sudo systemctl start asterisk
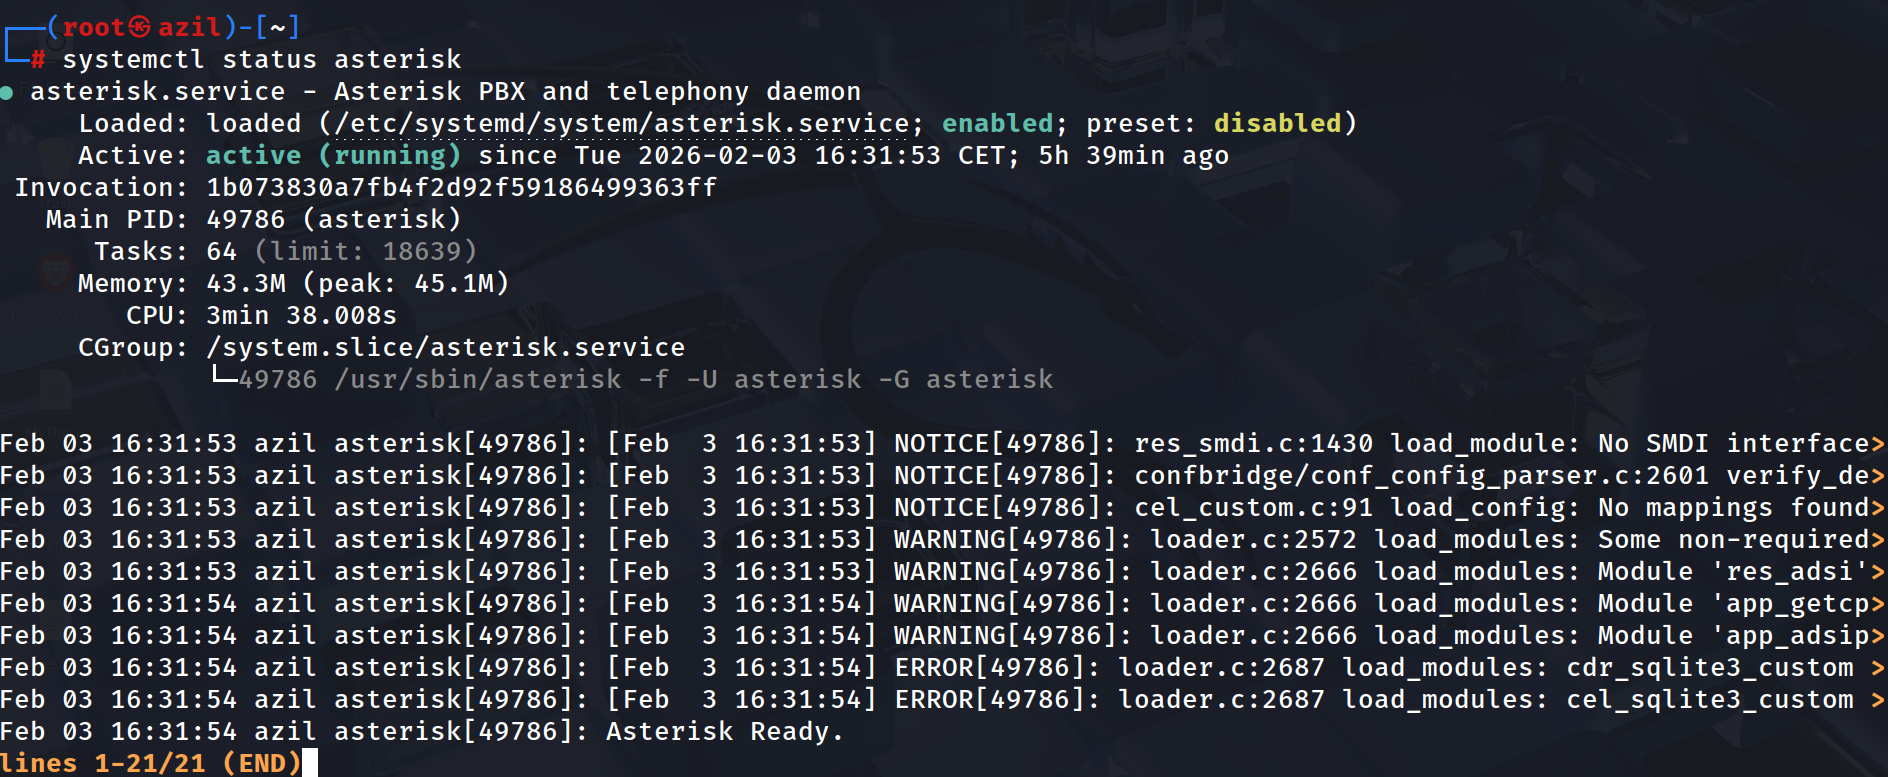
After starting the service, verify that it is running correctly and without errors:
1
sudo systemctl status asterisk
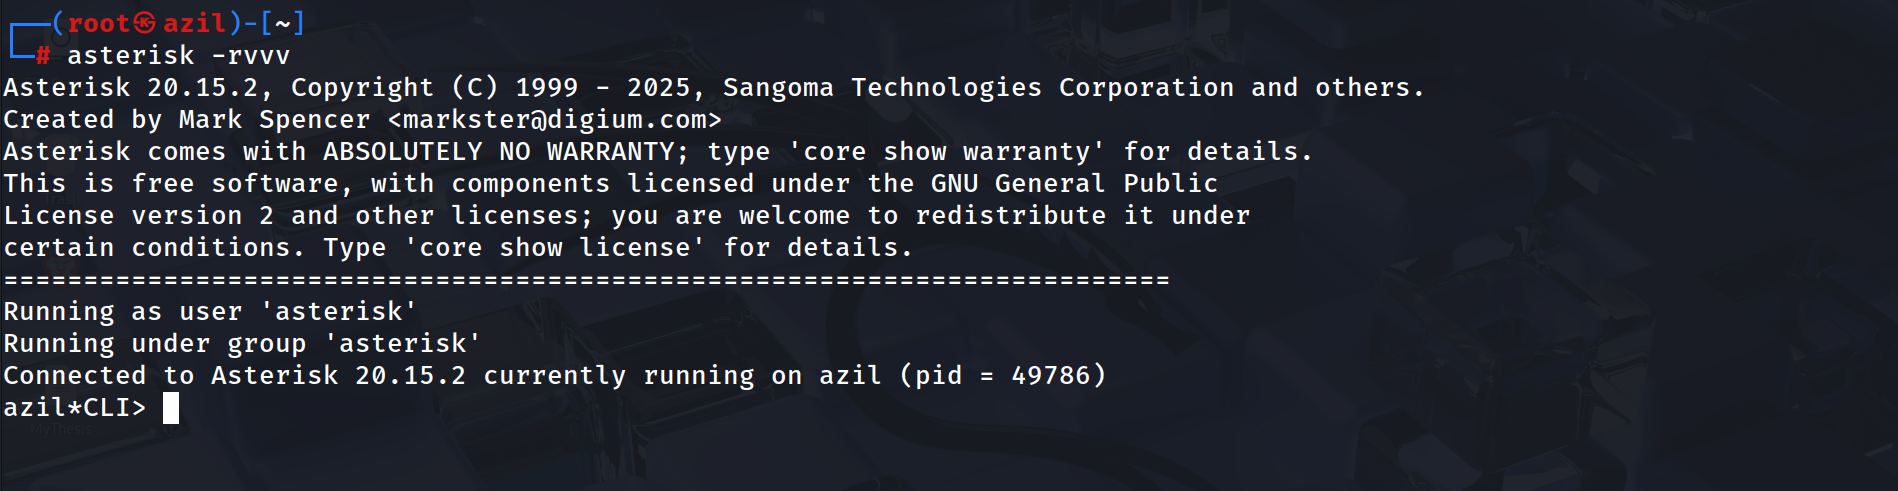
Once the service is confirmed to be active, you can access the Asterisk Command Line Interface (CLI) using the following command:
1
sudo asterisk -rvvv
SIP Users Configuration :
First, we need to configure the pjsip.conf file located in /etc/asterisk.
The pjsip.conf file is the core of SIP communication in modern Asterisk versions. It defines SIP users through a modular structure. Each user typically requires three interconnected sections: endpoint (the main configuration), auth (for credentials), and aor (Address of Record, for managing registrations). Additionally, a transport section must be defined to specify the protocol (UDP, TCP, TLS, etc.). Within each configuration block, the object type is identified by the type= parameter.
First, open the configuration file using your preferred text editor. In my case, I am using Vim, so I run the following command:
1
sudo nvim /etc/asterisk/pjsip.conf
You will notice that the file already contains some default configuration. However, I prefer to start from a clean setup and configure everything from scratch.
To do this safely, we first create a backup of the original file:
1
sudo mv /etc/asterisk/pjsip.conf /etc/asterisk/pjsip.conf.bak
This command simply renames the original file by adding the .bak extension, allowing us to keep it as a backup in case we need it later. After that, we can run the first command again to open a new, empty pjsip.conf file and begin our custom configuration.
Global Section
The [global] section defines parameters for the underlying PJSIP stack. While optional, it is used to customize how Asterisk identifies itself and handles system-wide SIP behaviors. The user_agent option sets the identification string sent in the User-Agent header of SIP packets. This helps administrators and remote devices identify the software and version of the connecting server.
1
2
3
[global]
type=global
user_agent=Asterisk20
Note : While we have set this to Asterisk 20, this is a manual string. It does not automatically update if you upgrade Asterisk; it simply tells other devices what you want them to see.
Transport Section
Next, we define the transport section. This section specifies how Asterisk sends and receives SIP messages over the network.
1
2
3
4
[transport-udp]
type=transport
protocol=udp
bind=0.0.0.0
This configuration tells Asterisk to:
Use UDP as the transport protocol
Listen on all available network interfaces (
0.0.0.0)Use the default SIP port (5060)
Endpoint Section
The endpoint section defines how Asterisk handles a SIP user. It includes parameters such as codecs, dialplan context, caller ID, transport method, authentication, and contact information (AOR).
1
2
3
4
5
6
7
[1001]
type=endpoint
transport=transport-udp
context=local
disallow=all
allow=ulaw,alaw,vp8,h264
callerid=Amine <1001>
This configuration defines a SIP user with ID 1001:
Uses UDP for transport
Is associated with the
localdialplan contextFor optimal compatibility and security, we disallow all codecs globally and explicitly allow specific audio (
ulaw,alaw) and video (vp8,h264) formats.CallerIDSets the display name and number for outbound identification.
Integration Note : Because PJSIP is modular, this endpoint must include the auth and aors parameters to link it to the user’s credentials and registration state.
Authentication Section
The auth section defines the credentials that a SIP device (IP phone or softphone) must provide in order to register with the Asterisk server. This allows Asterisk to verify that the device is authorized.
1
2
3
4
5
[auth1001]
type=auth
auth_type=userpass
username=1001
password=1001pass
This section defines authentication for SIP user 1001:
Uses
userpassauthenticationRequires the username
1001Uses the password
1001pass
AOR (Address of Record) Section
The AOR (Address of Record) section defines where and how Asterisk can reach a SIP user. It specifies how many devices can register and helps Asterisk track the user’s current network location.
1
2
3
[1001]
type=aor
max_contacts=1
This configuration:
Defines the AOR for SIP user 1001
Allows only one device to be registered at a time (
max_contacts=1)
The max_contacts parameter controls how many devices can register using the same SIP account. For example:
max_contacts=1→ only one deviceHigher values → multiple devices can register simultaneously
Scalability and Multiple SIP Users
As demonstrated, you can manage multiple SIP users by creating separate sections for each identity. Because PJSIP is modular, every user requires its own endpoint, auth, and aor blocks. By assigning unique identifiers and credentials to each section, Asterisk ensures:
Secure Authentication: Each user has a private username and password.
Accurate Routing: Unique AOR (Address of Record) settings allow Asterisk to track the exact network location of every device.
Identity Management: Custom Caller ID settings ensure the correct name and number are displayed during calls.
This organized structure allows the system to manage hundreds of users efficiently while keeping their configurations independent and secure.
Extensions Configuration: Dialplan
The extensions.conf file is the core logic of Asterisk. It controls how calls are handled, such as call routing, forwarding, voicemail, and other call features.
As we did before, we first make a backup of the default configuration file:
1
sudo mv /etc/asterisk/extensions.conf /etc/asterisk/extensions.conf.bak
Then, we create and open a new extensions.conf file using our text editor:
1
sudo nvim /etc/asterisk/extensions.conf
Global Configuration
First, we define the global settings of the dialplan:
1
2
3
[general]
static=yes
writeprotect=no
The [general] section sets general options:
static=yesmeans the dialplan is always loaded by Asterisk.writeprotect=noallows us to edit the file.
Local Context
The [local] context defines the dialplan logic for internal extensions. It acts as a set of instructions that tells Asterisk how to route a call when a specific number is dialed.
1
2
3
4
[local]
exten => 1001,1,Dial(PJSIP/1001,20)
 same => n,VoiceMail(1001@default,u)
 same => n,Hangup()
Call Flow Execution:
Call Initiation: Asterisk attempts to reach the SIP endpoint 1001 via the PJSIP stack for a duration of 20 seconds. Fallback to Voicemail: If the user does not answer or is unavailable, the same => n directive moves the call to the Voicemail system. Termination: Once the voicemail is recorded or the process is complete, the system executes a Hangup to clear the line.
Link with pjsip.conf
The context name [local] must match the context parameter defined in your pjsip.conf endpoint (If we did in pjsip.conf like [saad] in extensions.conf it must be the same [saad]). This ensures that when a user picks up the phone, Asterisk knows exactly which set of rules (dialplan) to follow.
Direct Access to Voicemail
Asterisk also allows users to access their voicemail directly using a special extension:
1
2
3
exten => 6000,1,Answer()
 same => n,VoiceMailMain(@default)
 same => n,Hangup()
When dialing 6000, the user is connected to the voicemail system.
VoiceMailMain(@default) opens the voicemail menu, where users can listen to messages and manage their mailbox.
Voicemail Configuration
To use voicemail correctly, we need to configure the voicemail.conf file. This file allows Asterisk to store voice messages and gives users access to their voicemail boxes.
As done before, we first create a backup of the original file:
1
sudo mv /etc/asterisk/voicemail.conf /etc/asterisk/voicemail.conf.bak
Then, we open a new voicemail.conf file using our text editor:
1
sudo nvim /etc/asterisk/voicemail.conf
Voicemail Configuration Example
Below is an example of a basic voicemail.conf configuration:
1
2
3
4
5
6
7
8
[general]
format=wav
maxmsg=100

[default]
1001 => 1234,Katia
1002 => 1234,Nadia
1003 => 1234,Zaki
Explanation:
The
[general]section defines global voicemail settings.format=wavsets the audio format used to save voicemail messages.maxmsg=100defines the maximum number of messages per mailbox.
The
[default]section defines the voicemail boxes.1001,1002, and1003are the mailbox numbers.1234is the PIN code used to access the voicemail.Katia,Nadia, andZakiare the names of the users.
While not strictly required by the system, it is a best practice to ensure the mailbox number matches the extension used in the dialplan and the SIP user in pjsip.conf. This consistency ensures that Asterisk can easily route calls to the correct mailbox and allows users to manage their messages without configuration confusion.